Create Your Own DIY Succulent Garden
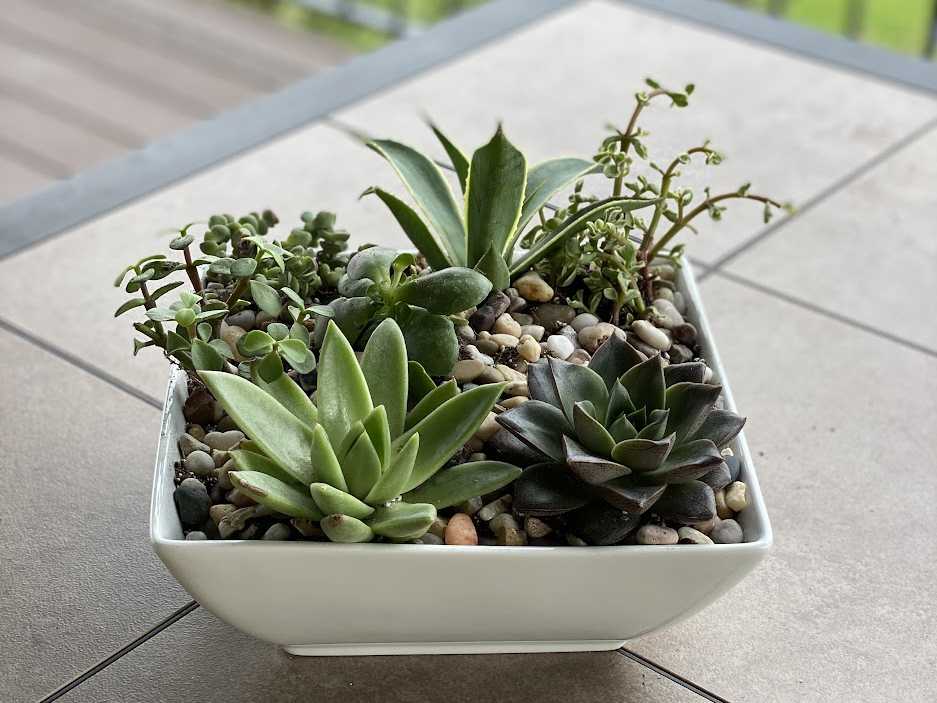
Creating a small succulent garden is an easy way to try out your green thumb and add a touch of interest to your space. Succulents are easy to care for and come in a variety of shapes and sizes, so it’s fun and easy to customize your garden to fit your preferences.
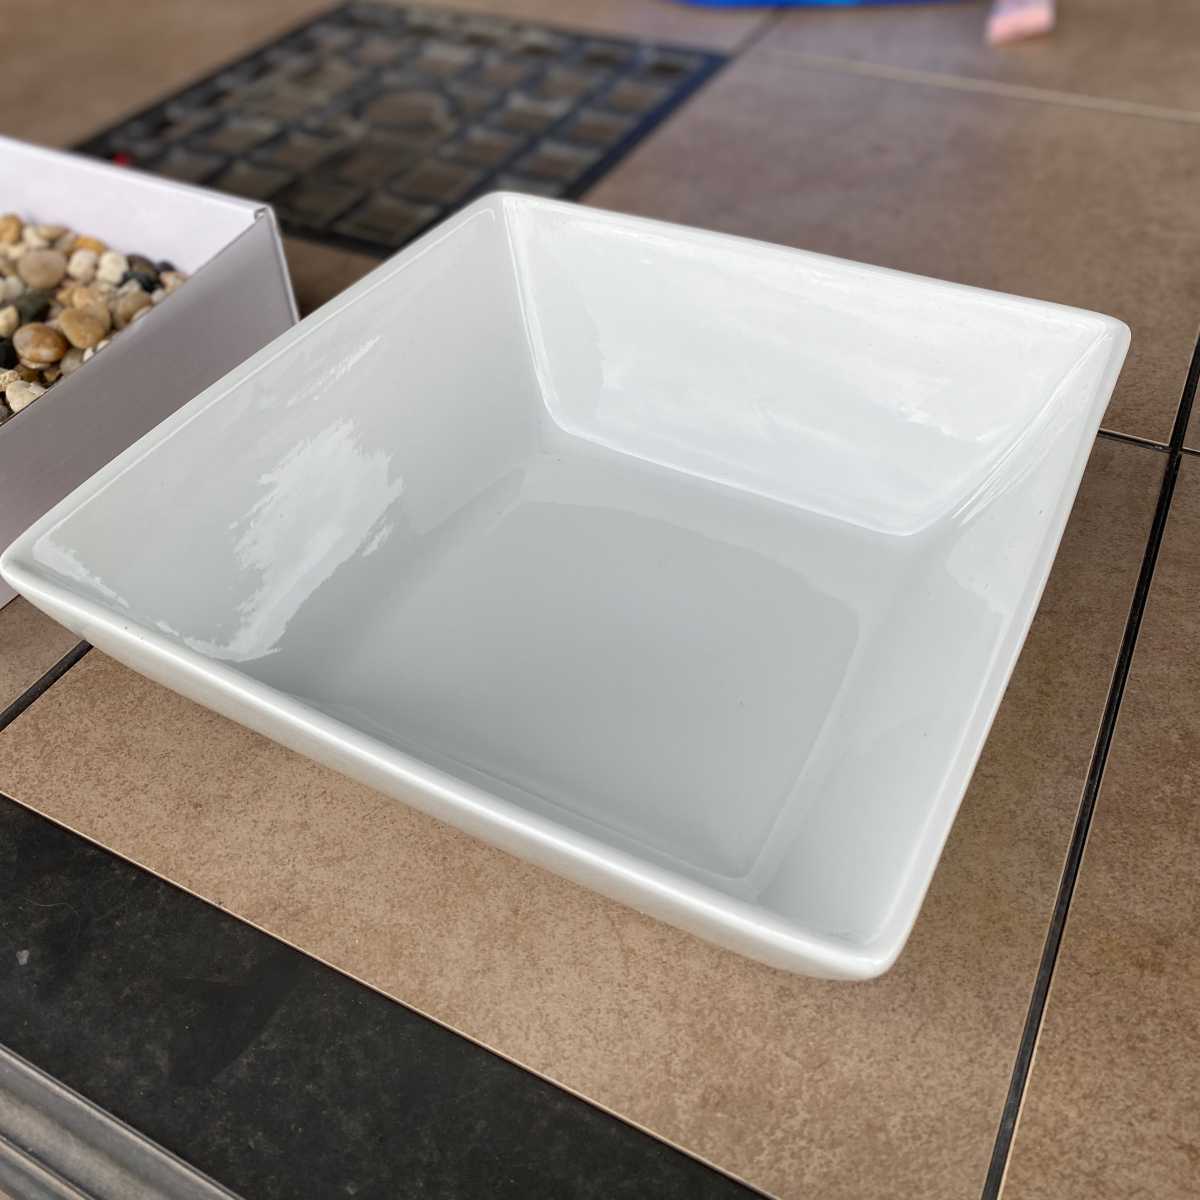
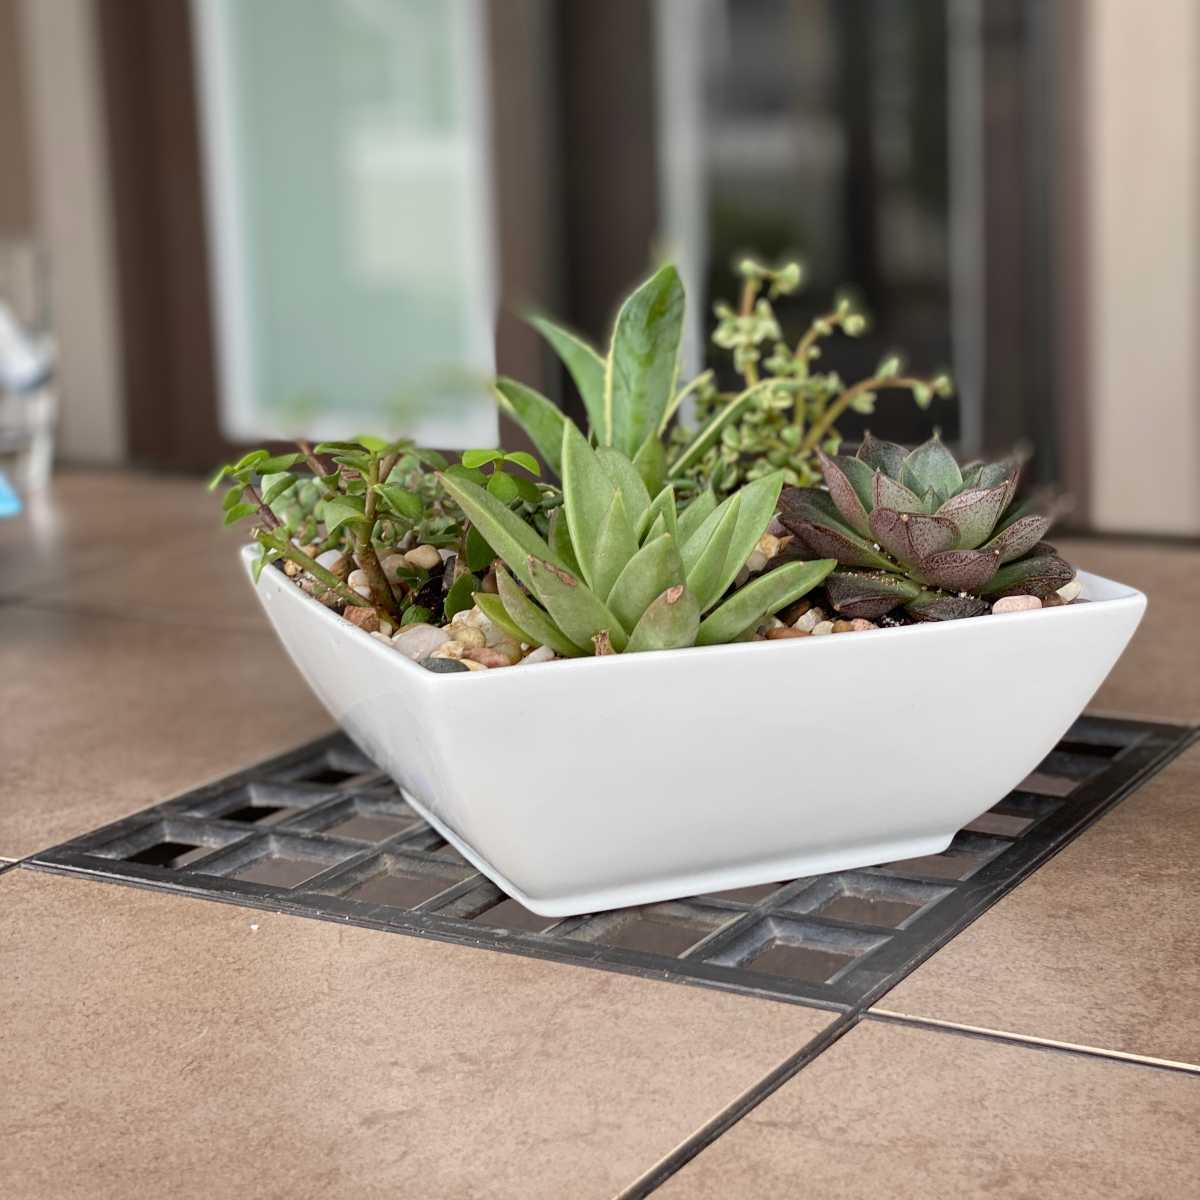
Start by choosing a container for your garden. You’ll find many options in the housewares section at Deseret Industries. Bowls, serving dishes, and mugs are good options to explore. A collection of colorful mugs, each with a single plant, would brighten a windowsill. A decorative bowl would make a perfect centerpiece on a table. Choose containers that are a little deeper than the height of your plant(s).
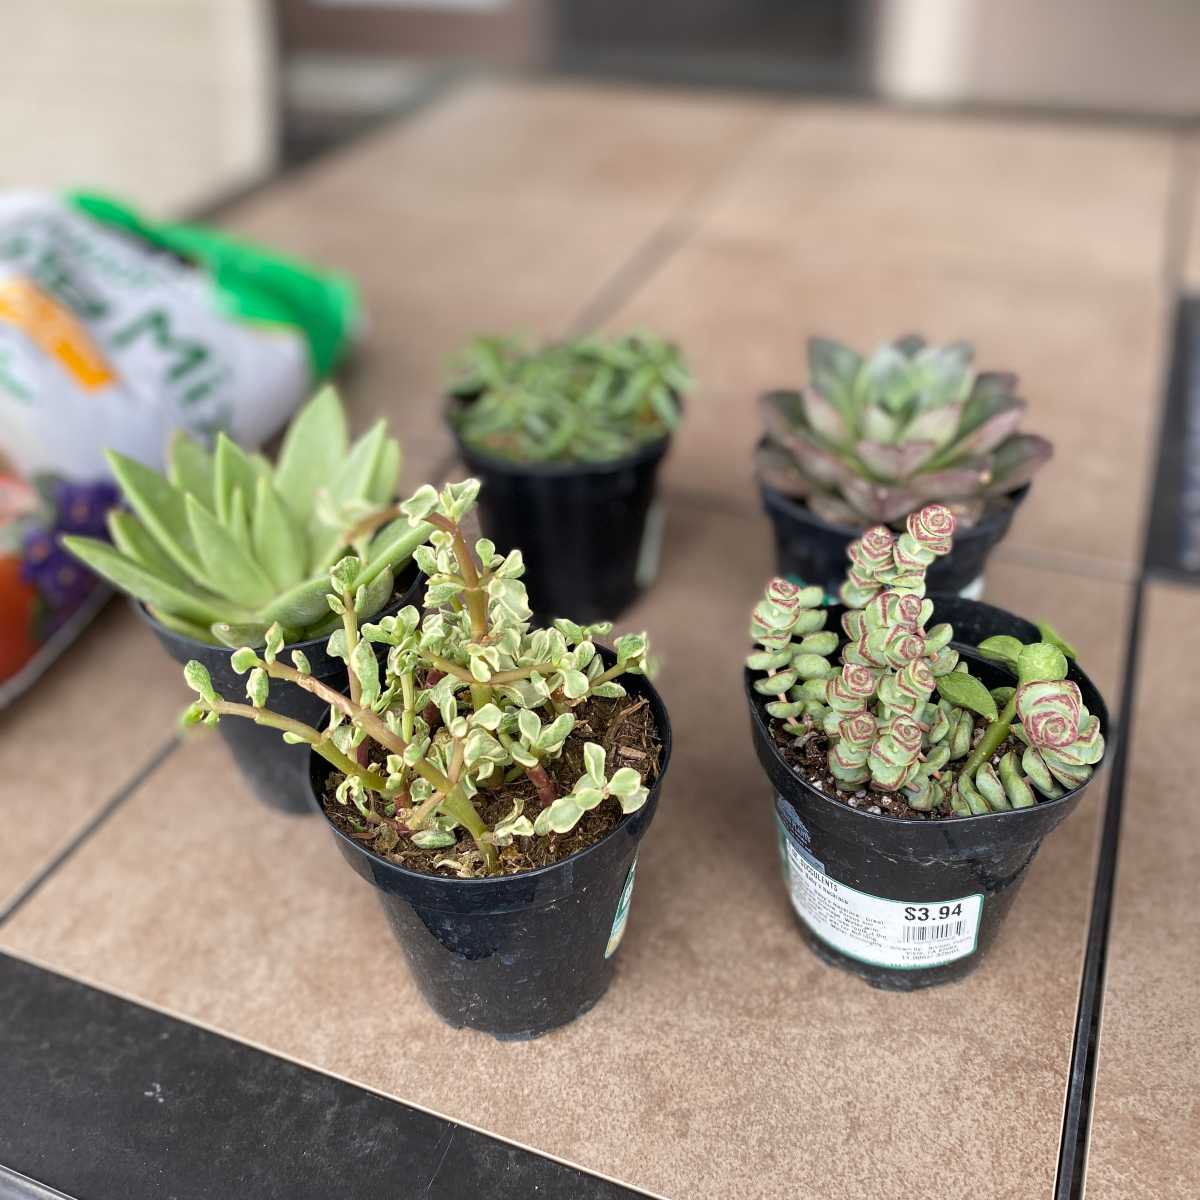
Next, you’ll choose your succulents. There are several varieties of succulents (including many that are not spiky!), and most succulents will even bloom in the right conditions. Home improvement stores and garden centers typically offer a variety of succulents that you can choose from. There are also options to purchase plants online and have them shipped to you.
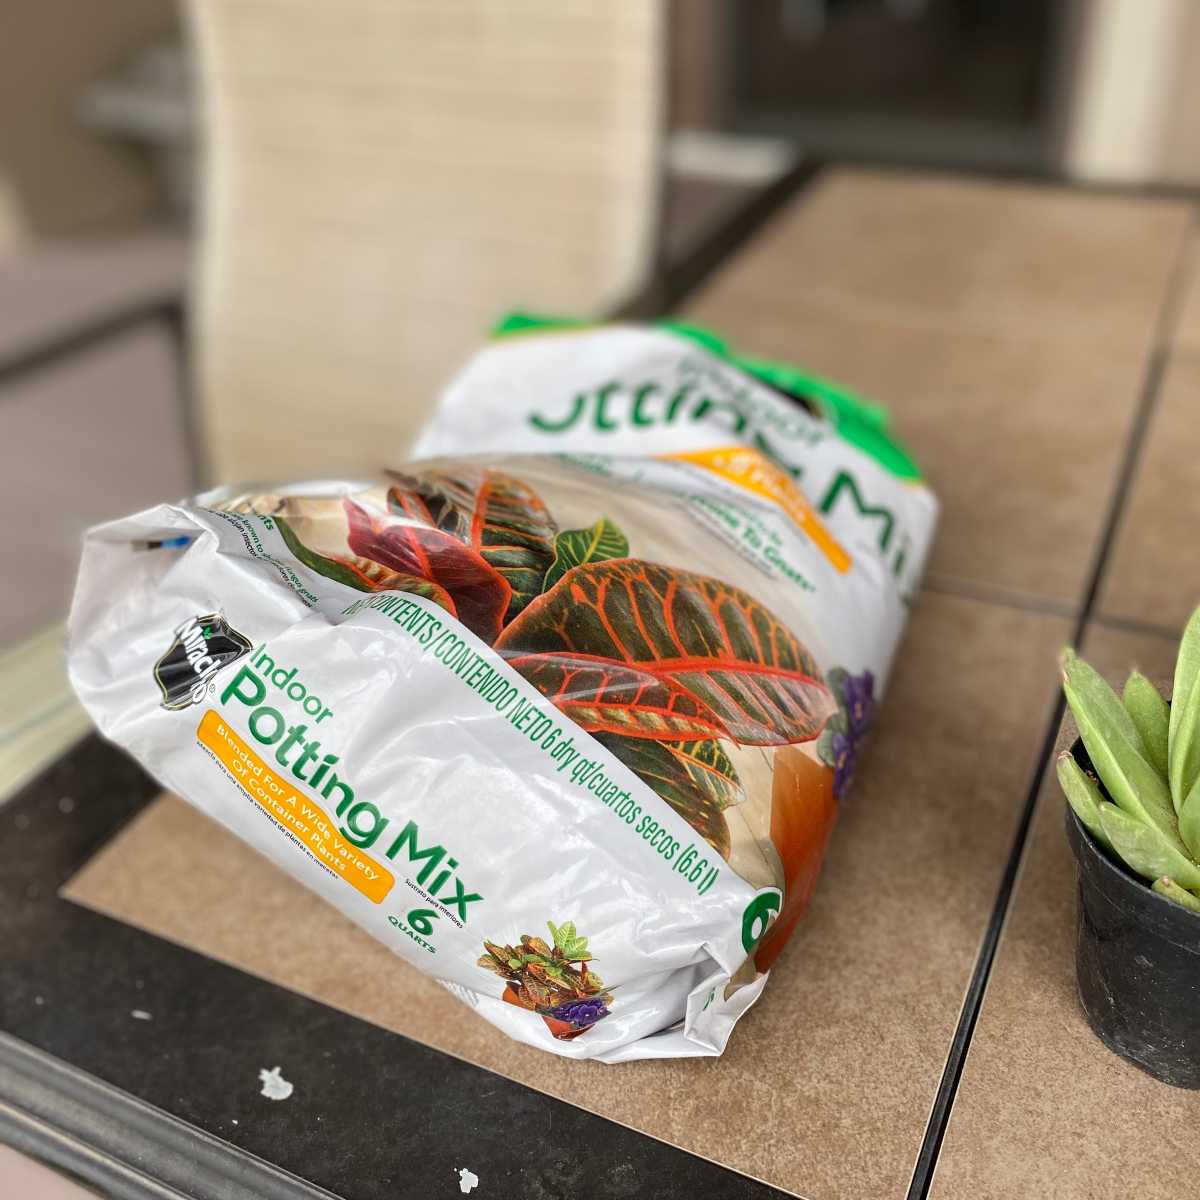
There are a few other things you’ll need to complete your succulent garden:
1. Soil: Succulents need well-draining soil. You can purchase a potting soil specifically made for succulents (sometimes called cactus soil) or you can create your own by mixing 3 parts regular potting soil, 3 parts sand, and 2 parts perlite.
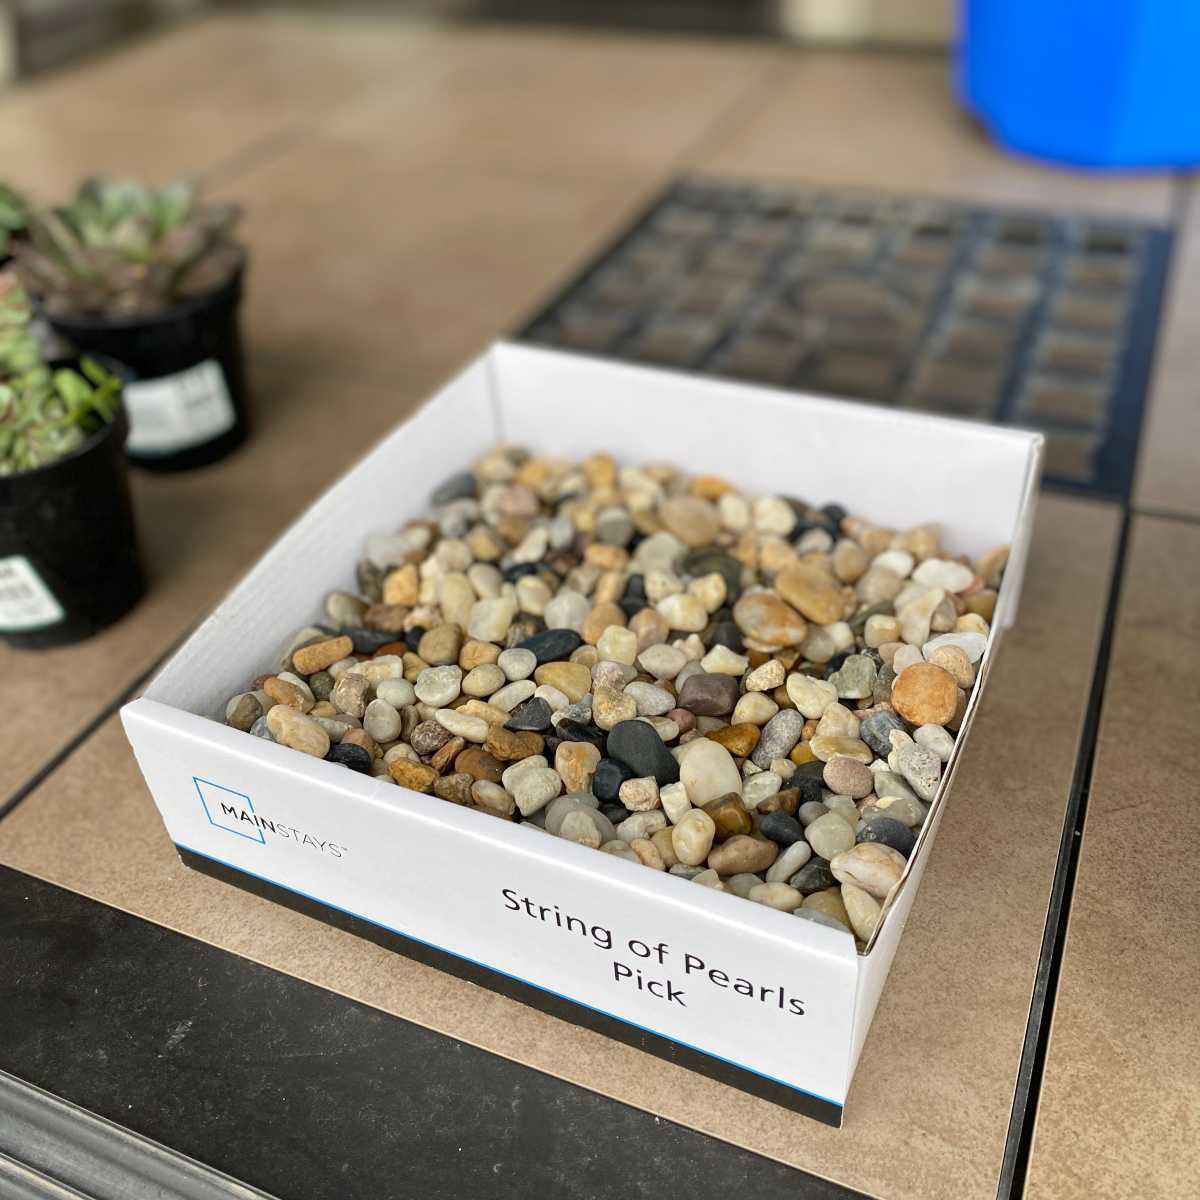
2. Drainage: Succulents do not do well in standing water, so you’ll need a way to ensure your soil is draining well. You can provide drainage by either carefully drilling holes into your container (search online to learn how to safely drill holes in the material your container is made of). Or you can add a layer of pebbles in the bottom of the container. Bonus: you can use any extra pebbles as a decorative element on top of the soil.
Once you have these materials, you’re ready for planting.
Put a layer of soil over the bottom of your container (or your drainage). You’ll want it to come to the same height as your container. Hollow out a spot for your plant(s), then gently place your plant(s) in the soil and carefully fill in the soil around them. Be careful when handling the plants, as succulent roots are very delicate.
Now that your succulent garden is complete, it’s just a matter of caring for your plants.
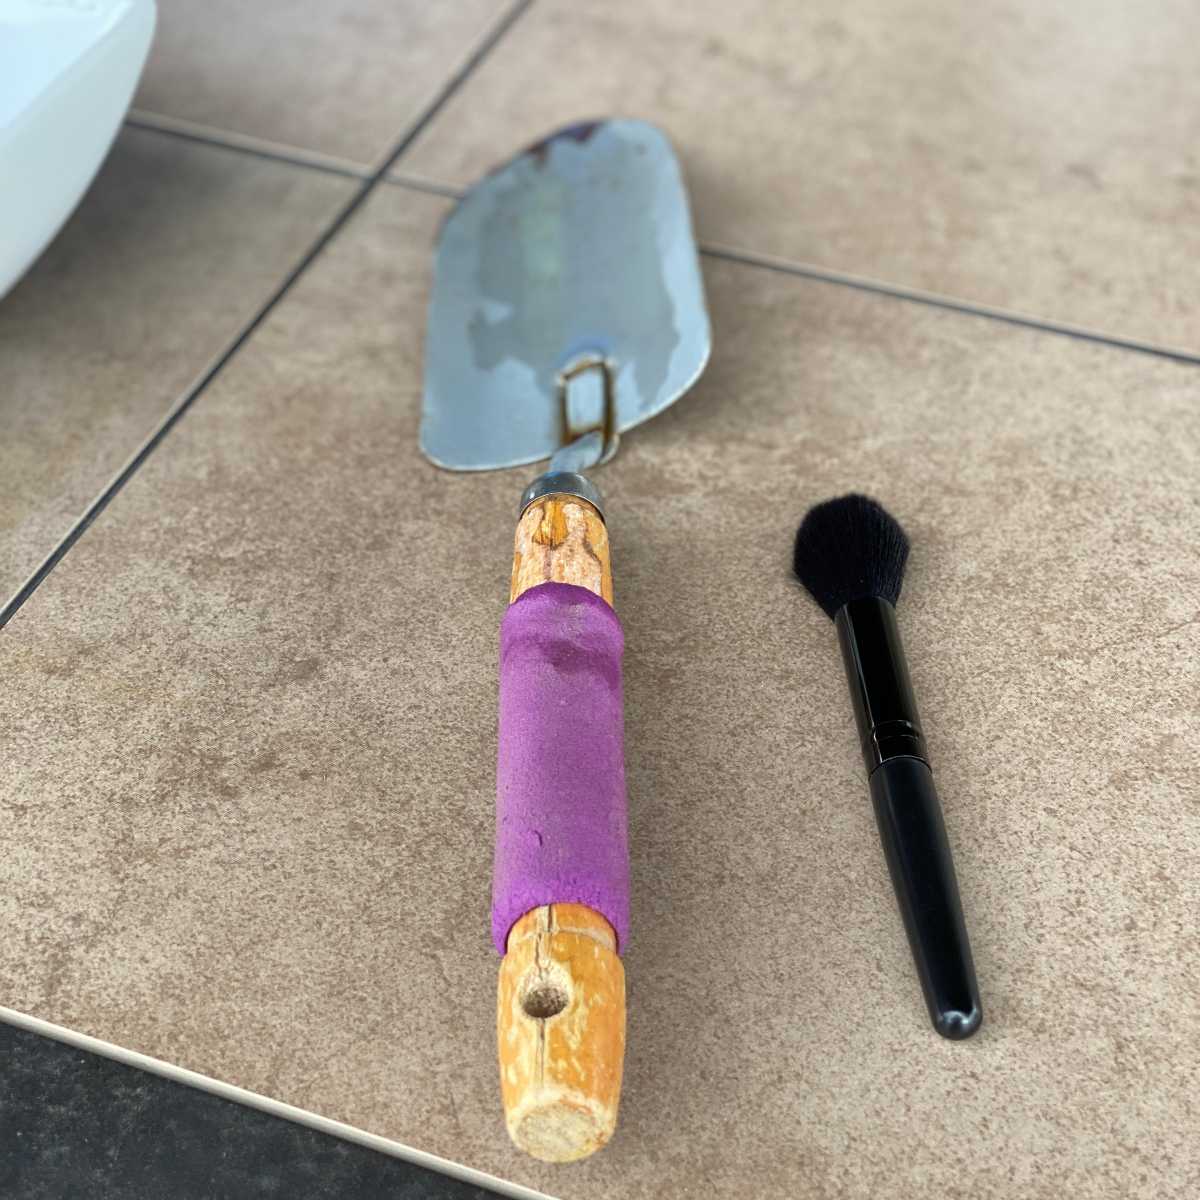
- Cleaning: After planting, use a soft make-up brush to carefully clean dirt from the leaves and spines. It’s a good idea to clean dust from the plants every few months to help keep them healthy.
- Watering: Be sure to water the soil directly and avoid misting or pouring water on your plants. After watering, the soil should be moist—not soaked. Water the plants only when the soil is bone-dry.
- Sunlight: Succulents do best when exposed to sunlight 6–8 hours a day. Newly planted succulents will scorch easily in the heat of direct sunlight. If your spot is particularly sunny, you might want to consider gradually exposing your new garden to more and more direct sunlight over several weeks.
With so many succulent varieties and container options from DI, this project is easy (and fun!) to customize based on your design preferences. Are you considering creating your own succulent garden? Is it something you’ve tried in the past? Upload a photo and tag us on Facebook (@deseretindustriesthrift) or Instagram (@deseret_industries) for a chance to have your DIY project featured. We can’t wait to see the results!
Recent Posts

How Development Counseling at Deseret Industries Builds Individuals
Discover how Development Counseling at Deseret Industries helps individuals overcome barriers, gain confidence, and create better lives for themselves.
.jpeg)
How to Clean Thrifted Clothes 101
Thrifted clothes can become as good as new after using tips for scent and stain removal and following guidelines for washing and drying.

Donating to Deseret Industries: The How, What, and Why
Learn how to donate to Deseret Industries, what items are accepted, and how your contributions support job training and community impact.
Top 5 Kids’ Items to Thrift
Discover the top 5 children’s items to thrift—from clothes to toys—while saving money and supporting your community.